[How to add a "Saved Place" to my compass]

Welcome to the "Saved Places" tutorial. This tutorial was written using the Bedican version of the Compass, but other derivations works very much the same way.

Firstly, what are X, Y and Z coordinates and why do we care?

X, Y and Z coordinates within the There world
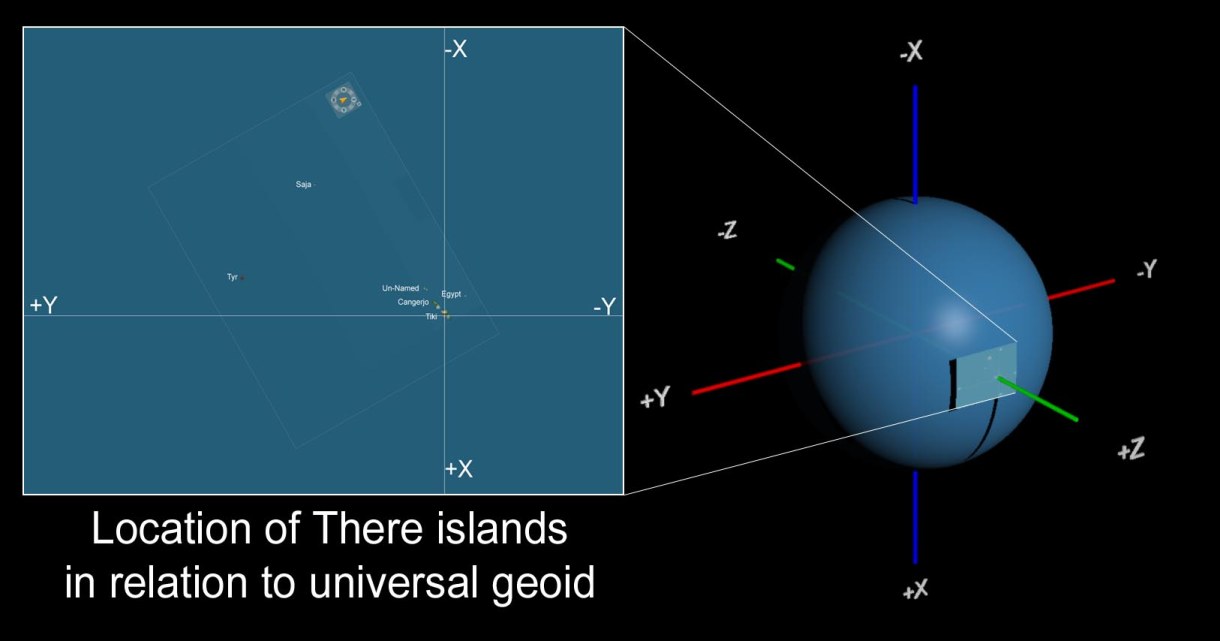
The "Center of There" (coordinates 0,0 (X and Y)) is on Caldera (the largest of the Tiki Islands).
All (X and Y) coordinates are derived from that central point.
The Z-coordinate "0" is in the center of the "planet" of There.
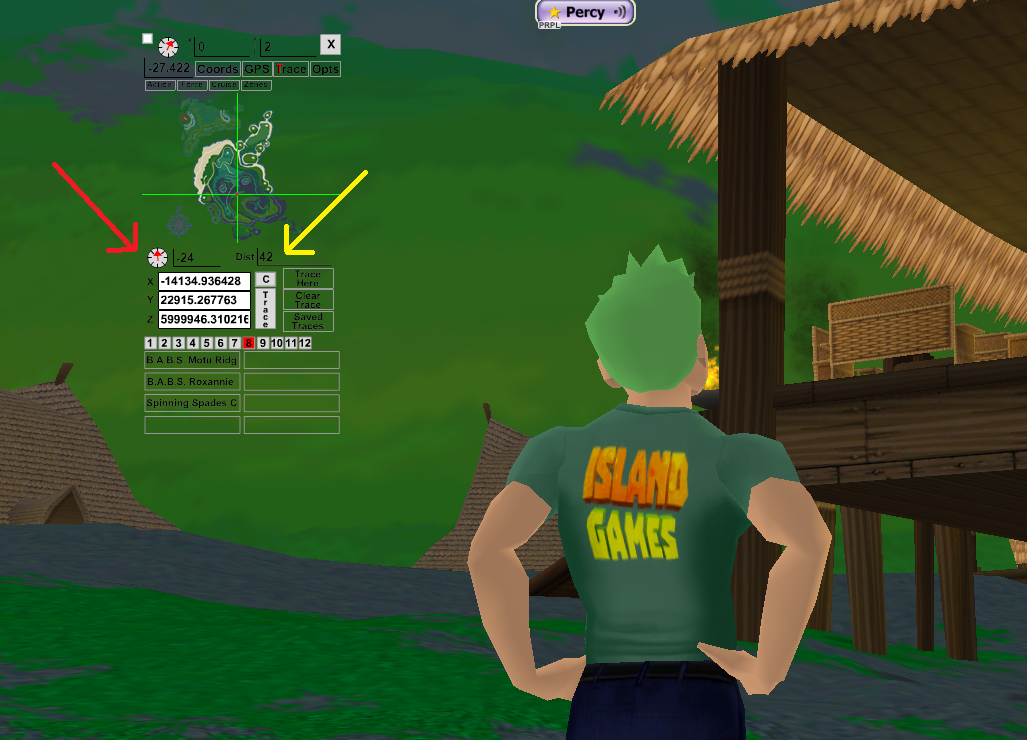

To find out at what coordinates you are, pull up your GPS using the command    /gps

A small window will pop up that will (hopefully) show an island and your location on it, indicated by a green crosshair.
If you are in the middle of the ocean, it will show a tiny representation of the main islands and your relative position to them.

For our purposes, we need to click the button labelled [Trace]

GPS, with [trace] marked

This will extend the window on the GPS:

trace window  
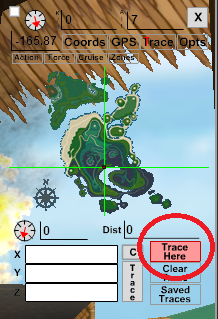
Now go ahead and click [Trace Here]


traced location 
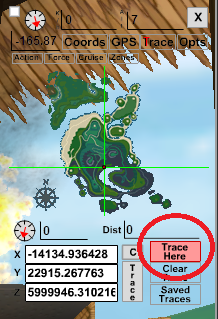
You will now see the coordinates we spoke about above for your location and a small red marker will blink at the intersection of the crosshair.

Go ahead and make a note of the X, Y and Z coordinates, or, if you're fancy like me, take a screenshot.
In this case, X = -14134.936428 (note the minus symbol), Y = 22915.267763 and Z = 5999946.310216
Seeing how X has a minus value, we can surmize that your location is "North" or "Up" from the "Center of There" (0,0).
Y has a positive value, so it is "West" or "Left" of the "Center of There" (0,0).
Z is basically elevation, calculated from the center of the planet.
So, in this example, even without seeing the map picture, we can see that we are "North West" of Caldera.

You also see a button marked [Saved Traces] (in the context of this tutorial, "Places" and "Traces" refer to the same thing).

saved traces  
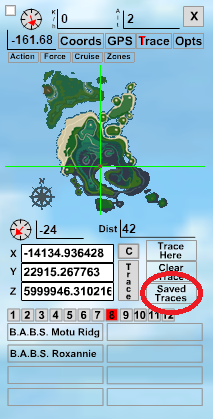
(The shown saved places (Page 8) were from the last B.A.B.S. Flotilla. Your compass most likely only has predefined spaces up to Page 7).


Now that we have the information we need, we can go ahead and enter it into the Compass' "database" of Saved Locations.

(And NO, you do not need to close your client for this)

Assuming you used the default installation folders for There, you will find the file you need in: C:\Makena\There\ThereClient\Resources\compass

Where to find "SavedPlaces.xml" 
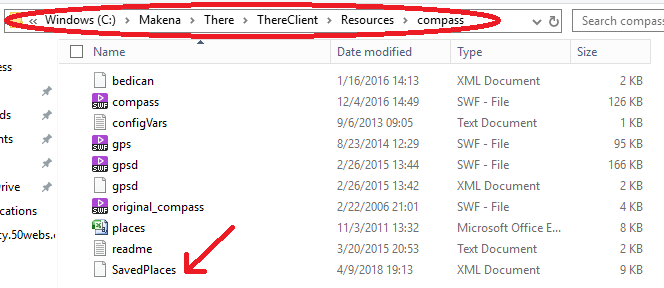
(Rightclick the file and select "Open With" (It can be opened in any text editor, like Notepad))

The file has the following "schema" (I deleted the actual places in this example):
empty savedplaces
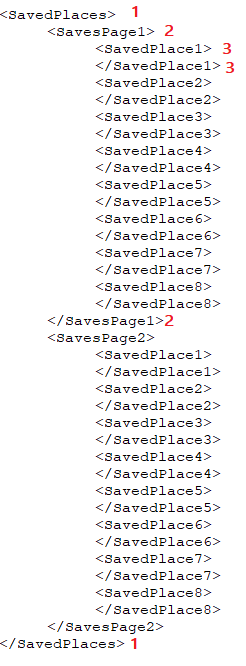
Any [TAG] needs to have a [/TAG]. ("open" and "close")

So 1. <SavedPlaces> has a </SavedPlaces> at the end of the file. 2. Every <SavesPage> (which are the "pages" you saw in the "Saved Traces" window, numbered from 1 to 8.) has a  </SavesPage> and 3. Every actual "location" (<SavedPlace>) has to have a </SavedPlace>.

Boneyard example    
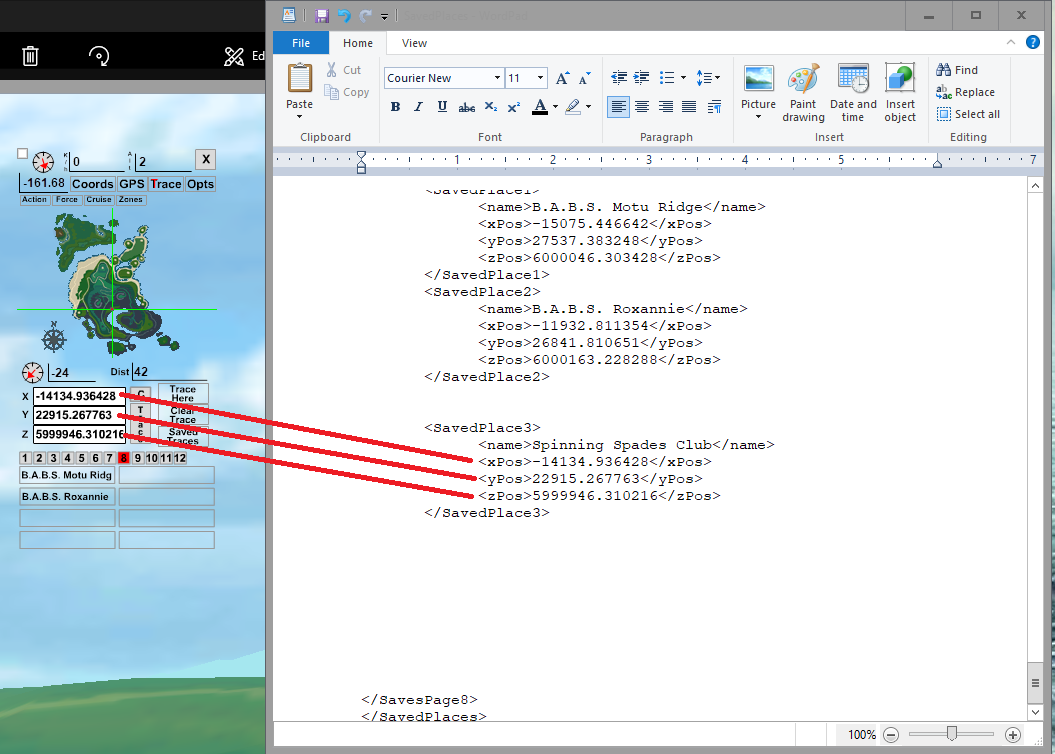
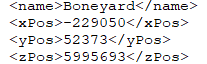
The relevant part for us, is the actual data of the location. It features NAME, X position, Y position and Z position.

You may ask, as you are the curious sort, "But why does the Trace have a decimal point and that "Boneyard" example does not?"
It is added accuracy, so you may leave the numbers behind the decimal point out if you so wish, as traces are technically meant as a "show me where it is within a few meters".

As you saw in the above screenshots, in this particular example, I was already on Page 8 and am about to enter a third location to that page.
(I added some spaces for clarity).
Enter the text shown within the red circle.

Getting ready to enter data
In this example we'll use Spinning Spades Club (Yes, I'll admit, it is a shameless plug)

Adding the data

You can clean up the file a bit by deleting empty lines (although it'll work with empty lines in between just as well).

Now save the file and reload your compass (Like: switch it off and back on)

new location added 
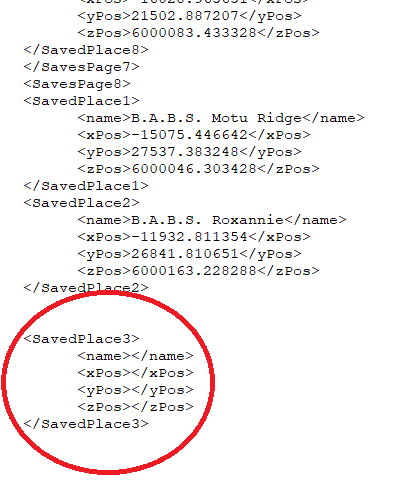
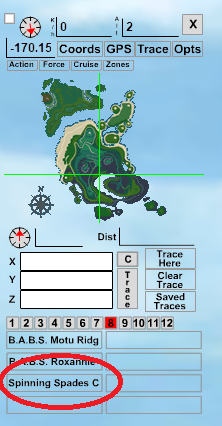
Now if you open your GPS and go to saved traces, you'll have a shiny new location :)

Click the new location and it'll show you the blinking red dot.
Finally, you may have noticed (You don't miss ANYTHING, do you?) that there are two red arrows indicating directionality.

direction and distance

The relevant one when tracing to a location, is the bottom one. If it points straight up, you are heading straight for it.
The number at the yellow arrow on the image above, shows the distance to the saved location.
In this case, since I took the original screenshots standing in front of my club, I am now 42 meters from where I originally traced the location.

If you added the location I labelled as "B.A.B.S. Roxannie" (as the actual name is way too long to put in the tracename), try clicking that one and try to find it using your phenominal explorer skills.

Have fun!

Percy. Him, from over There.